A milestone is used to mark the point in the contract’s life-cycle where something should happen or the point in time by which a series of tasks should be complete. A milestone may be created without any tasks.
When editing an individual contract, milestones can be created from 3 different places in the user interface:
- Directly from contract or option periods.
- When editing contract terms and conditions.
- Individually from the milestones tab on the user interface.
To create a milestone directly from a contract or option period, select the flag icon beside the date field to open the dialogue box.
To create a milestone directly from Terms & Conditions, click the flag icon below the segment.
Every milestone created in the system has the following properties:
- Name*
- Due date*
- Tasks
- Reminder
- Description
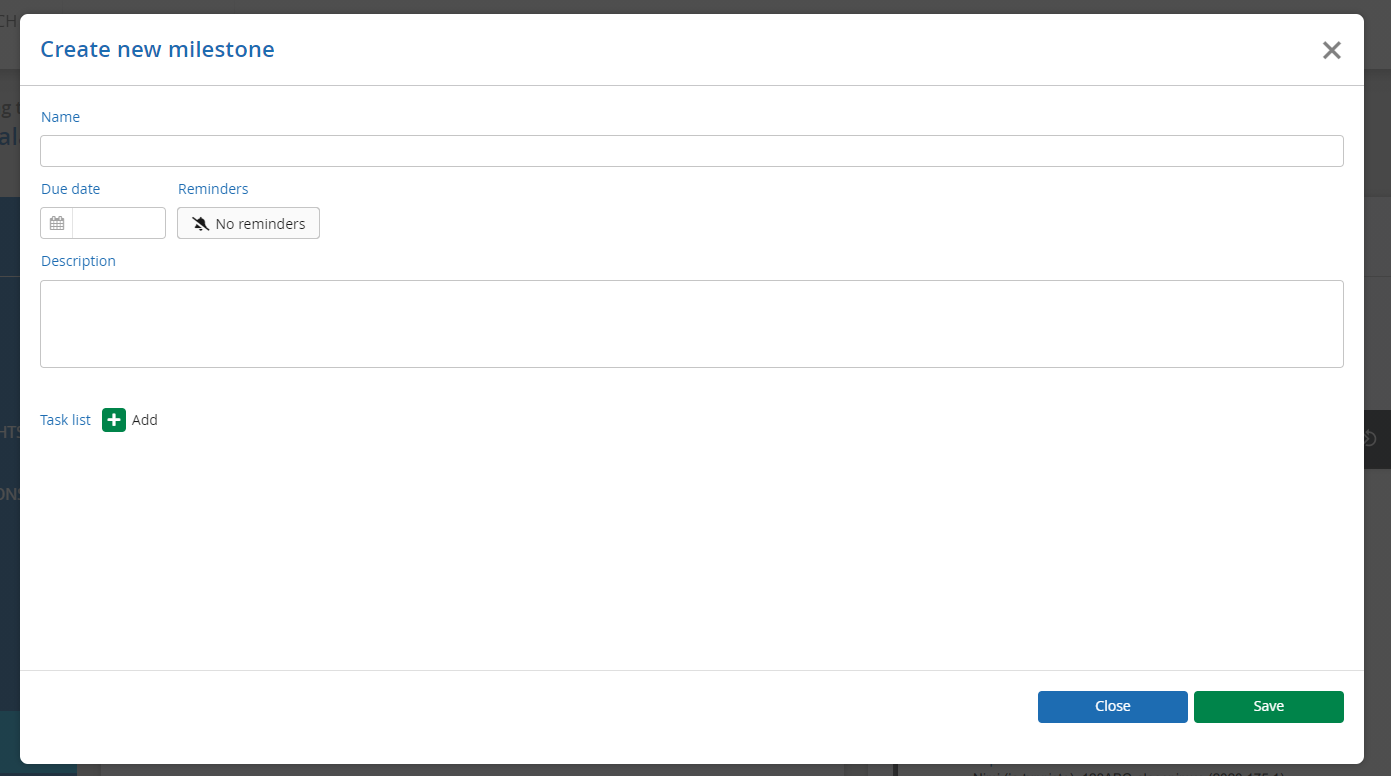
The date field determines the point in time when the milestone occurs. This date will be shown on the contract’s timeline. To set the date click on the small calendar icon.
Once a date is set the reminder field is automatically set to the same date. This means a reminder (email and system alert) will be sent to the contract owner on that date. Note that the icons turn green once a value has been configured.
If desired, the reminder settings can be modified, or additional reminders can be added. To change the settings, click on the reminder button.
The reminder can also be timed i.e. shown at set amount of time before a due date. To do this click the drop-down box and select the ‘Scheduled’ option. From here the alarm can be set to the desired amount of days, weeks or months prior to the due date.
Clicking the add button will add an additional reminder. Only the persons responsible for a contract will receive the reminders regarding a milestone.
If multiple reminders are set, the reminder button shows that there are multiple reminders.
The description field is optional and can be filled with details about the nature of the milestone. This information can be seen on other parts of the user interface.
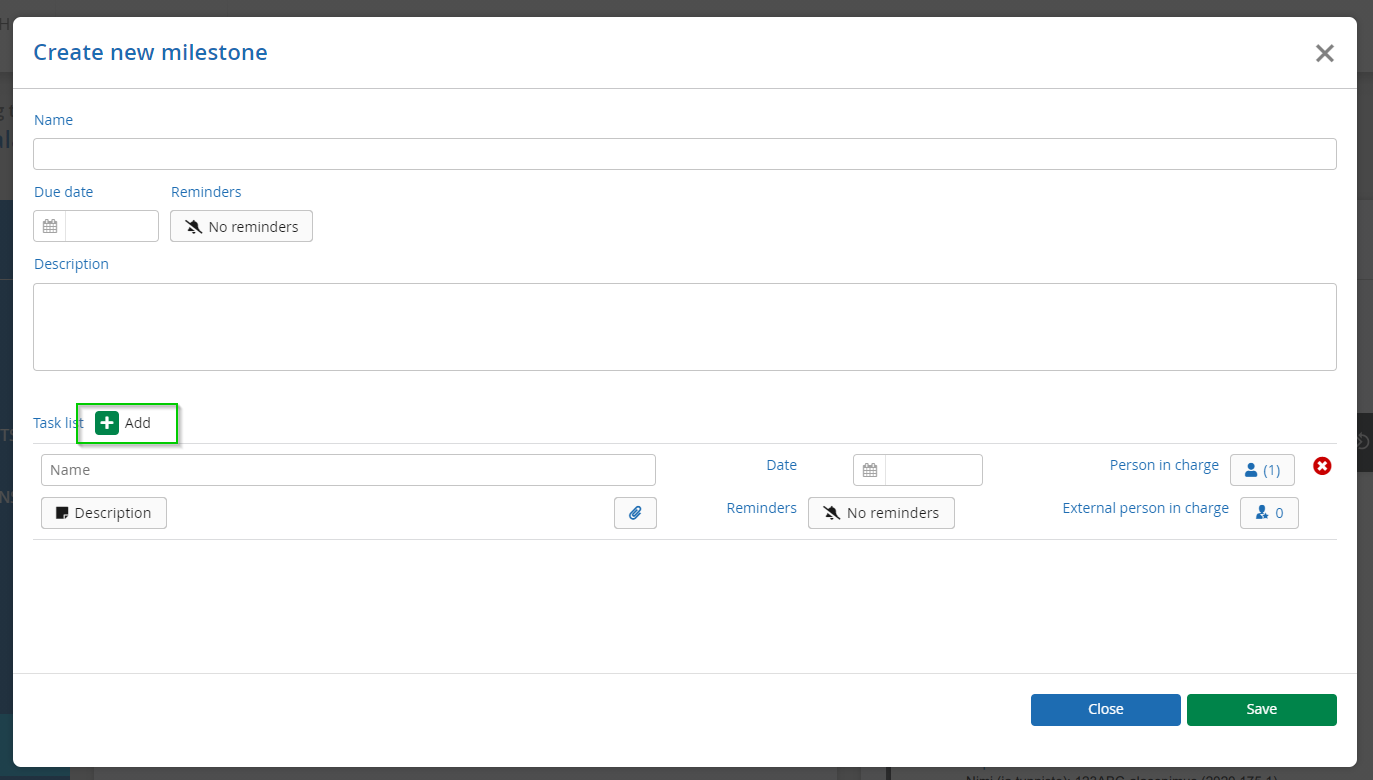
Adding tasks to a milestone
Multiple tasks can also be added, and each task can have a separate due date (which must occur on or before the milestone due date). Click the add button to begin creating a task.
Each task must be given a name and due date. Optionally, tasks can have a description, reminder and a person who is responsible for the task. As with milestones, reminders are automatically set to the task’s due date but can be modified.
To add a description to a task, click on the small icon beside the task name and enter the details.
To assign an internal user as responsible for the task click the small user icon, click add and then browse or search for the desired person from the list.
The user icon with a small star is used to add responsibility to someone who is external to the system. External users will receive an email with details about the task, based on the reminder settings.
Additional tasks can be added to a milestone. Each task will appear on a contract’s timeline.
To complete the creation of the milestone, the Save button is clicked. Pressing Cancel will delete all the changes made to the milestone (NOTE: the contract must also be saved once the milestones have been created and saved).
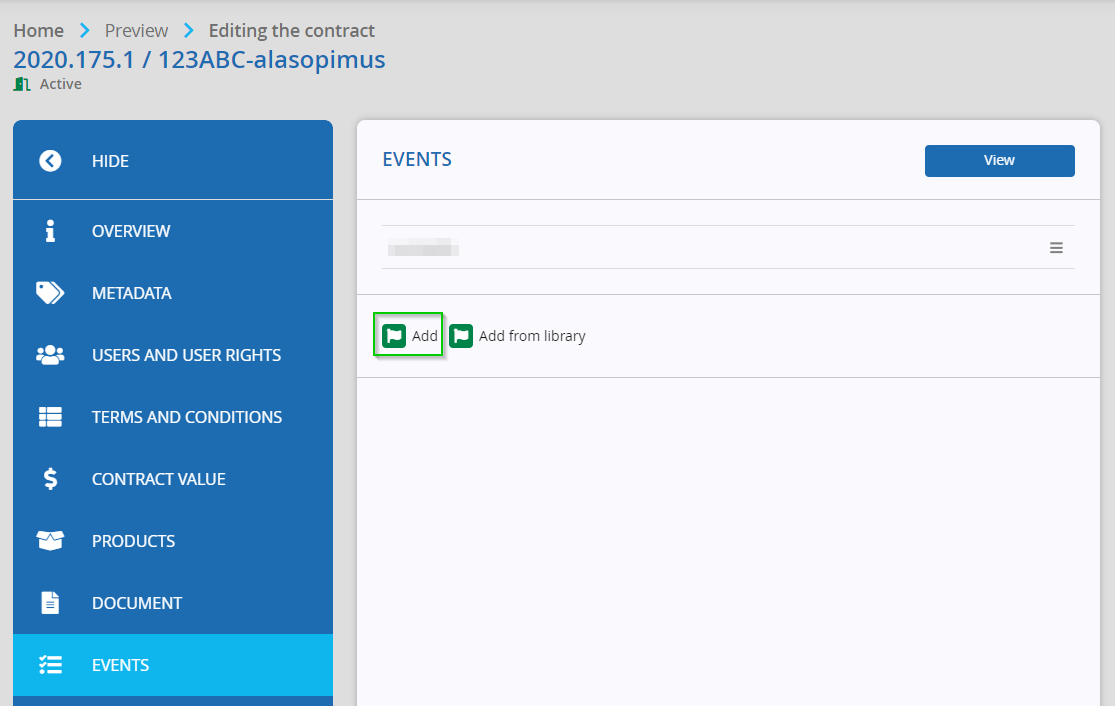
To view the milestones already created, select the Events menu option from the menu bar on the left.
A list of milestones is presented, along with options to add a new milestone or import one from the library. The menu option can be selected to edit or delete a milestone.